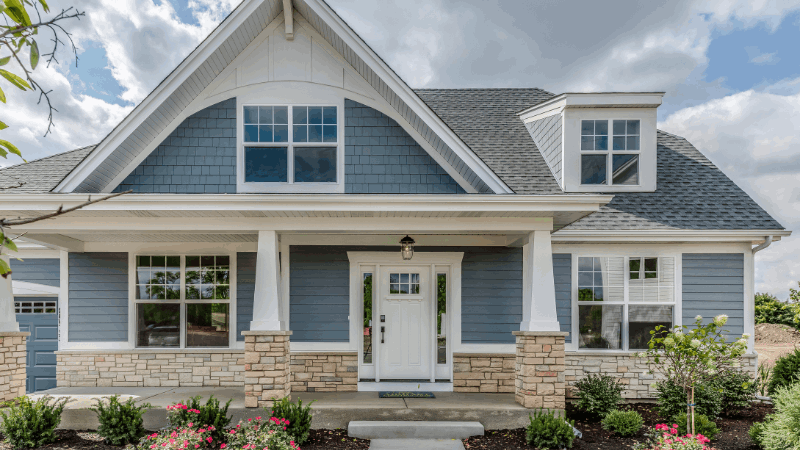
Is Purchasing a Fixer-Upper a Good Decision?

Is Purchasing a Fixer-Upper a Good Decision? Are you pondering the idea of purchasing a fixer-upper home? Here's what you need to understand about acquiring one and whether it's a worthwhile investment. Purchasing a home is a significant financial commitment and an investment in real estate. If you're prepared to invest additional effort into a property known as a "fixer-upper," available at a reduced market price, then this might be the right choice for you. A fixer-upper home represents a serious investment because it demands full commitment from the outset. Increasingly, buyers are considering homes that aren't ready to move into, hoping to save money. With housing prices continuing to climb and limited inventory available, many buyers are coming to terms with the possibility that their ideal move-in-ready home might not be feasible. Over half of potential buyers are open to the idea of purchasing a fixer-upper, with about 73% citing the lower listing prices as a compelling reason. A fixer-upper is generally less expensive than a ready-to-move-into home, but the costs of renovations and repairs must be considered. There are professionals who can assist in identifying valuable projects to undertake. What to Know When Considering a Fixer-Upper Chapters What Is A Fixer-Upper Tips for Purchasing a Fixer-Upper How To Buy A Fixer-Upper Pros and Cons Of Buying A Fixer-Upper Should You Buy A Fixer-Upper? 1. What Is A Fixer-Upper A fixer-upper is typically available at a lower purchase price because it requires significant maintenance after purchase, akin to a foreclosed home. While some fixer-uppers are livable, they often require considerable investment in both structural and cosmetic enhancements. 2. Tips For Buying A Fixer-Upper Understand the full scope of what you're buying. Properties that need extensive work could end up costing more than anticipated. It's crucial to plan thoroughly, considering everything from your financial situation to the property's location. Buying a fixer-upper is an exciting venture that offers personalization and creativity in a home, but it's vital to consult with a real estate professional to find the right property. Location and Budget  Always consider the neighborhood's appeal and budget wisely, anticipating costs accurately and planning for unexpected expenses. Get a Home Inspection This will help identify any major issues that could become costly. 3. How To Buy A Fixer-Upper Partner with a real estate agent who has access to comprehensive listings. Ensure a thorough home inspection is done before making a purchase, and realistically assess whether the renovation needs are within your budget and capabilities. 4. Pros and Cons Of Buying A Fixer-Upper Pros: Customize to your liking Potentially less competition Lower initial purchase price Quick equity building Control over renovations Cons: Requires substantial upfront cash for renovations Renovations can be time-consuming Some improvements do not increase home value Budgeting challenges Potential for unforeseen complications 5. Should You Buy A Fixer-Upper? Purchasing a fixer-upper has surged in popularity as it allows buyers to craft their ideal home while potentially saving money and adding value through improvements. However, these projects are costly and time-consuming, so it's crucial to be sure of your capacity to manage them before committing. Conclusion While a fixer-upper can be an excellent investment, it can also turn into a financial drain if not approached with careful planning and realistic expectations. Each fixer-upper is unique, and the decision to buy one should be based on your personal circumstances, financial stability, and home improvement skills. If you're up for the challenge, a fixer-upper can be a rewarding project that allows for significant personalization and value increase.
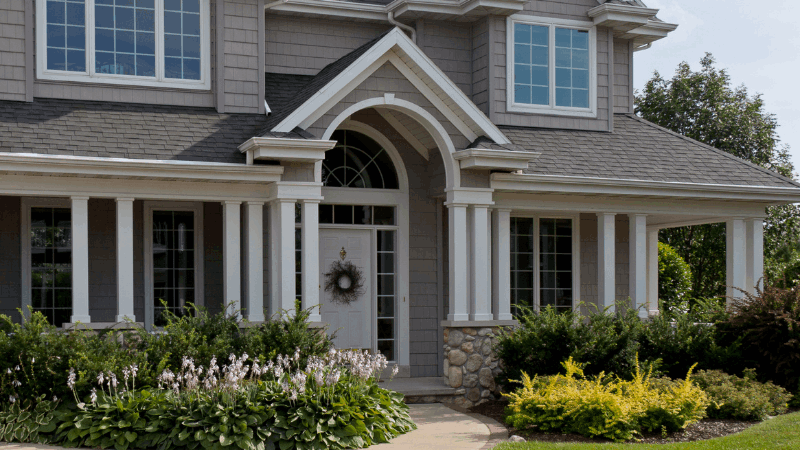
7 Steps To Make Your Home Energy Efficient

Steps To Make Your Home Energy Efficient Are you considering ways to make your home energy efficient? Here are the steps to achieve an energy-efficient home and the benefits of doing so. A more energy-efficient home means lower bills and reduced carbon footprint. There are many reasons why you should make your home more energy efficient. Whether you live in an older home or a new one, there are many simple and inexpensive ways to save energy. According to the United States Energy Information Administration, the average US home uses around 867 kilowatt hours of electricity a month, with the most significant share of that energy being spent on essential utilities such as air conditioning and heating. With new technology, there are many ways to reduce that. As our world is changing and embracing sustainability, energy-efficient homes are becoming a popular trend. According to Climate Action, energy efficiency does save your money, so having an eco-friendly home is an easy way to save yourself some money when being a homeowner. More energy-efficient products may seem expensive at the time, but they can save you money in the long run and lower your bills. You can make your home more energy efficient in many ways, from simply sealing cracks, replacing filters, and turning off lights. You do not need to go above and beyond when having an eco-friendly home; just start with the basics. Here is how you can make your home energy efficient. Chapters Look At The Numbers Work On AC and Heating Add Insulation Upgrade to Energy-Efficient Appliances Keep Up Your HVAC System Change Your Habits Benefits of Energy-Efficient Home Improvements 1. Look At The Numbers The first step to reducing your energy bill is to look and find out where it is being used the most. You can hire a local energy auditor or consult online tools that can walk you through your home, lifestyle, and recommendations. There are also other ways to look at the numbers, such as a home energy monitor that can transmit data to an app on your mobile device, which will allow you to track your home's energy usage in real-time. There are also affordable smart plugs that can tell you how much energy things are using. Several of these smart gadgets have apps that can help you track your home's energy affordably. You may also contact your utility provider for help as well. 2. Work On AC and Heating Heating a home is usually the second biggest energy absorber in the United States, right after cooling. It can sometimes be hard to want to turn down the heat or stop blasting the AC, so smart gadgets like smart thermostats can help you make these adjustments to save energy. These smart gadgets are a great way to reduce energy as well as save money since there are many affordable options. These thermostats use sensors to tell when you are away and can learn your daily schedule and preferences while using local weather data to make energy-saving adjustments. Electrical fans can also reduce electricity bills over an air conditioner, but that does depend on the house size, layout, and construction. Air conditioners are a significant source of the heat Island effect, where cities become hotter than the surrounding environment. For environmental reasons, reducing your reliance on air conditioning and reversing your ceiling fans in the winter can help save energy and lower your bills. There are many small ways to reduce this; however, it depends on where you are located and your personal preferences. 3. Add Insulation Adding insulation fixes will also trim your energy bill. Minor improvements such as window insulation film or putting an area rug down on an uninsulated floor can make a huge difference in how much energy it takes to heat the room. Without proper insulation, you can have a lot of heat transfer in your home. In the summer, that means windows can let in the hot air, and in the winter, the hot air can leave the house. Air sealing your home can be such a significant way to reduce energy and electricity bills. Sealing cracks, gaps, and leaks while adding insulation to places can help save up to 10% on your home heating and cooling costs. Adding insulation may seem like a lot, but it is very simple and can save you so much money in the long run. Adding more insulation to your home may make it more comfortable, and it will take less heating and cooling to reach the desired temperature without blasting your unit and wasting electricity. Your attic, exterior walls, and basements are ideal for sports, and you should look into adding insulation. 4. Upgrade to Energy-Efficient Appliances If your home and the appliances are getting older, they could be wasting a lot of energy. If you upgrade and replace washing machines, dryers, fridges, stoves, and other appliances, you may save more money in the long run. Many new modern appliances are Energy-Star rated, which means they are certified for energy efficiency. Energy Star has made many home upgrades that are designed to work together to deliver significant energy and cost savings while helping you transition from fossil fuels to a cleaner, healthier, and more comfortable home. According to Energy Star, the six areas of a home where efficient improvements can be made are clean heating and cooling, a super-efficient water heater, a smart thermostat, a well-insulated and sealed attic, high-performing windows and storm doors, and electric-ready appliances and equipment. Some energy-efficient products may seem expensive at first, but in the long run, changing to these efficient products can have a huge impact on the environment as well as your utility bills. 5. Keep Up Your HVAC System If you do not want to replace your HVAC system with a more energy-efficient mode, you can also save energy by using your current one. Regular routine maintenance, including changing the filters and having a technician inspect the system at least once a year, can help keep your HVAC saving energy. Home heating and cooling systems claim more than half of total household energy consumption and can cost you thousands of dollars to replace. Keeping your HVAC system in the best condition to save money in many ways is very important. Here are some everyday things homeowners should do to maintain their HVAC system, keep it in excellent condition, and save energy all year long. Change the air filter Doing this every three months is recommended to keep the system running smoothly and improve air quality. Clean the outdoor condensing unit At the start of every season, remove any debris from the unit and spray down the outside to clean off any grime or dirt that has been building up. Clean the outdoor unit Clear out any plants or dirt that have been building up in the way to eliminate interference. Make sure the bushes and trees around are at least two feet on all sides. Check the air conditioner drain line Make sure to clear out any blockage that has been building up in the drain line to prevent breakdowns or any interior leaks. Get regular maintenance Bring out an HVAC technician at least once a year to check out the system and perform inspections to extend the lifespan of the system life. 6. Change Your Habits Many ways you use your electrical items can impact your energy use. There are several simple ways to save energy in your home, especially just small changes that can make a huge impact on your energy cost, and that can start with what you do in your home. Did you know your electronics keep running even if you turn them off? About 75% of the energy used to power electronics is consumed when they are shut off. There are many ways to decrease this number and save money. Unplug electronics to save energy and money Here are some simple steps to make your home more energy-efficient and lower your bills. Unplug all devices when not using them Use power strips to disconnect multiple items at once Changing light bulbs to energy-efficient LEDs Wash your clothes in cold water Use natural light as much as possible Do not peek in the oven when you are baking because the temperature can drop Use your ceiling fan to raise temperatures Use dishwasher and washers at night to keep the house colder Clean appliances Raise the thermostat a few degrees in summer and down a few in the winter Making small changes in your daily routine can lead to significant energy savings. While it can be challenging to change habits, the long-term financial benefits make it worth the effort. 7. Benefits of Energy-Efficient Home Improvements Smart homes are going green, and future trends include energy-efficient appliances, smart thermostats, and solar power systems. These technologies will not only reduce our carbon footprint but also significantly reduce utility bills. On average, energy-efficient homes sold for about 2.7% more than comparable homes without any sustainability upgrades. These upgrades are some of the most valuable improvements to make to your home, especially due to the rise in technology. There are many benefits to sustainability and energy-efficient homes beyond financial incentives. Below are some of the pros of these eco-friendly homes. Reduced Energy Bills Energy-efficient upgrades can significantly reduce energy consumption, which leads to lower utility bills over time. Environmental Impact By reducing energy consumption, energy-efficient upgrades help lower greenhouse gas emissions and combat climate change, which contributes to a Sustainable future Increased Home Value Energy-efficient homes are in high demand in the market today, so making these upgrades can increase the resale value of your home and make it more attractive to potential buyers Comfort and Health: Energy-efficient upgrades often result in better insulation and improved indoor air quality, which will create a more comfortable and healthier living environment. Lowering energy bills in energy-efficient homes There are many other pros to having an energy-efficient home, so if you are interested in upgrading your house, start shopping and researching now on what products and services you can add to your home for an increased living experience. Homeowners can save up to $3,200 annually on taxes for their energy efficiency upgrades. Save up to $1,200 on Energy Efficient Home Improvements Save up to $2,000 on Cost of Upgrading to Heat Pump Technology Save 30% on Residential Clean Energy Equipment Upgrades Methodology We used information and data from different sources as well as our own data about the steps to making your home energy efficient. There were various data to use, so we put them together to create a guide to help you. United States Energy Information Administration Climate Action Energy-Star Department of Energy Direct Energy Above are a few sources that we used to gather most of our information about steps to making your home energy efficient. FAQS What is the first step in making a home more energy-efficient? The first step to making a more energy-efficient home is conducting a home energy assessment (or audit) to determine how your home uses energy and determine the best way to cut energy use and costs. What is a low-cost way to make your home more energy-efficient? Cheap and straightforward ways to make your home more energy efficient can be by sealing cracks, gaps, and leaks while adding insulation that can save up to 10% of home heating and cooling costs. You may also clean and replace filters regularly so systems do not work as hard. How to lower electricity usage? Lower electric usage can be as simple as unplugging appliances, using fans instead of the air conditioning unit, covering windows to keep sunlight from heating your home, and cooling with the stove or microwave instead of the oven. Steps To Make Your Home Energy Efficient - The Bottom Line An energy-efficient home is one that provides homeowners with the comfort and utility they desire while consuming minimal energy. There are various ways to lower your energy bill while helping the environment, such as installing solar panels or using tankless water heaters. As energy costs continue to rise and energy-efficient solutions are becoming more accessible, it makes sense for more homeowners to prioritize home energy efficiency. Although there is no specific number to show how much money you can save, statistically speaking, you will spend less with an eco-friendly home over time. If you want to build or buy an energy-efficient home, consider reaching out to a local real estate agent for assistance in the buying process. If you are considering moving or selling, contact us or visit our website. Our team at Rhode Island Realty is here to help you with any home buying or selling needs.
Purchasing an Older Home in Rhode Island and Massachusetts

Purchasing an Older Home in Rhode Island and Massachusetts Purchasing an older home offers a blend of charm and unique architectural features, yet it can also present several challenges. From potential electrical problems to roofing concerns, here's a detailed guide to navigating the purchase of an older home. Opting for an older property often means embracing its distinctive character, historical elements, and exquisite craftsmanship. However, such homes can also entail unexpected complications and costly repairs. Since 1978, federal regulations have prohibited the use of lead-based paint, which was commonly employed in construction prior to this ban. Addressing the presence of lead paint can be expensive and poses health risks. While older homes generally come at a lower purchase price, they can require significant investment in repairs and updates. There's an allure to older homes, particularly in markets with low inventory. Prospective buyers are drawn to features like high ceilings, crown moldings, hardwood floors, and meticulous detailing. According to the U.S. Census Bureau, 12.2% of all housing units in the U.S. were constructed on or before 1939. In Rhode Island and Massachusetts, several counties are known for their abundance of older homes. It's crucial to understand what to look for and be aware of when considering these properties. Key considerations before purchasing an older home: Chapters Pricing Repairs and Updates Can Be Costly Increased Homeowners Insurance Essential Inspections Hazardous Materials Structural and Electrical Concerns Roofing and Pest Issues Outdated Features 1. Pricing Older homes typically have lower initial pricing, but this can reflect underlying issues that may lead to future expenses. A home priced unusually low may indicate extensive problems that the current owners wish to avoid. It's wise to inspect the property personally and review any available past inspections to assess its condition and livability. 2. Repairs and Updates Can Be Costly New homeowners might face significant expenses as they update or repair parts of their home to meet modern standards. Unexpected issues like mold under old flooring or hidden water damage behind walls can rapidly inflate renovation costs, potentially running anywhere from $500 to $40,000. 3. Increased Homeowners Insurance Older homes can lead to higher insurance premiums due to the increased risks and potential for expensive repairs. The average insurance cost for a century-old home is significantly higher than that of newer constructions. 4. Essential Inspections To avoid purchasing a "money pit," thorough inspections are indispensable. They can reveal structural issues or safety hazards that might necessitate immediate attention. 5. Hazardous Materials Materials like lead and asbestos, common in older constructions, can pose severe health risks. Professional inspections for these materials are recommended, along with radon testing to check for this harmful gas often found in older homes. 6. Structural and Electrical Concerns Older homes can have foundational issues or outdated electrical systems that are not equipped to handle modern electrical demands. Thorough evaluations for these problems are crucial. 7. Roofing and Pest Issues Roof repairs or replacements can be among the most costly updates. It's also common for older homes to host pests like termites, which can cause significant damage. 8. Outdated Features Many older homes lack modern conveniences and may have outdated layouts or finishes. Potential buyers should consider the costs and feasibility of updating these elements. Final Thoughts on Buying an Older Home While older homes can offer unique charm and character, they often require substantial investment to repair and update. Prospective buyers should thoroughly investigate structural integrity, potential leaks, electrical systems, roofing condition, and other outdated features before making a purchase. Although these investments can be high, they don't always outweigh the benefits of owning a home with such distinctive qualities. For those interested in exploring the market for older homes in Rhode Island and Massachusetts, consulting with a knowledgeable real estate agent can provide valuable guidance and assistance.
Why High-Quality Real Estate Photos Are Crucial

Why High-Quality Real Estate Photos Are Crucial If you're contemplating whether to hire a professional photographer for your home listing, the answer is a resounding yes. Let's delve into why high-quality real estate photos are so essential. Navigating the home-selling landscape can often feel overwhelming. In the bustling markets of Rhode Island and Massachusetts, homeowners are keen to sell quickly and at a premium. Among several strategies to enhance the home-selling process, professional listing photos stand out significantly. Effective marketing through stellar photos can significantly increase your home's visibility, attracting more offers and presenting more options to potential buyers. The path to selling your home involves listings, showings, inspections, and contracts, all of which can pile up stress. Professional photos can alleviate much of this pressure by presenting your home in the best light possible. Here are key reasons why investing in professional photos is worthwhile: Chapters Digital Dominance in Home Shopping Inviting Images Accelerating the Sale Process Higher Selling Prices Creating a Stellar First Impression Essential Home Staging Avoiding Common Pitfalls 1. Digital Dominance in Home Shopping Nearly 92% of homebuyers start their journey online, spending a significant portion of their time looking at photos rather than reading descriptions, reports the Wall Street Journal. High-quality images are crucial as they are often the first interaction buyers have with your home. In an era where digital presence matters immensely due to competitive markets, presenting your home in the best light online is non-negotiable. 2. Inviting Images A professionally staged home, captured with the right angles and lighting, appears more inviting. Such photos highlight the best features of your home, drawing in potential buyers. The emotional pull of visually appealing images cannot be overstated; they create a first impression that could sway buyers toward making an offer. 3. Accelerating the Sale Process Listings with professional photos receive 61% more views than those without. In a digital age where social media and online platforms are pivotal, high-quality photos can simplify and speed up the listing process, allowing real estate agents to focus on other aspects of the sale. 4. Higher Selling Prices Homes showcased with professional photos tend to sell at or above the asking price more frequently and 32% faster than those without. Quality imagery not only attracts buyers but can also significantly increase the perceived value of your property. 5. Creating a Stellar First Impression Real estate agents often rely on professional photos to make a compelling case to potential buyers. The visual appeal can strongly influence a buyer's decision-making process, setting the stage for a quicker and more profitable sale. 6. Essential Home Staging Before the photo shoot, staging your home effectively can make a dramatic difference. From boosting curb appeal to decluttering and choosing neutral colors, each step ensures that your home looks its best in photos, increasing the likelihood of quick offers. 7. Avoiding Common Pitfalls Selling a home involves numerous details and potential pitfalls. From underestimating selling costs to neglecting necessary repairs, many sellers make mistakes that can hinder the process. Being aware of these common errors can optimize your selling experience. FAQs About Real Estate Photography Why is photography important in real estate? Quality photos provide a better sense of the property, encouraging buyers to make offers. How do real estate photos look so professional? Professionals use expert lighting and camera setups to capture high-quality shots that a smartphone simply cannot replicate. Do photos really matter in real estate? Yes, compelling photography is crucial. About 72% of realtors believe that high-quality pictures secure more listings, while 83% of buyers find photos helpful in deciding which homes to visit. In Conclusion High-quality listing photos are not just a minor enhancement; they are a critical component of selling your home in today's digital age. Investing in professional photography can significantly ease the home-selling process, drawing more attention to your property and potentially increasing its sale price. If you plan to sell or list your home in Rhode Island or Massachusetts, don't underestimate the power of excellent listing photos. For more assistance, consider contacting a local real estate agency.
Essential Skills for Real Estate Agents in Rhode Island and Massachusetts

Essential Skills for Real Estate Agents in Rhode Island and Massachusetts What key abilities should every real estate agent possess? Here are 15 crucial skills that ensure a real estate agent is fully equipped to effectively handle the buying or selling of your property. Choosing the right real estate agent is critical, whether you're buying or selling a home. It’s important to verify that they not only have the necessary qualifications but also the traits of a top-tier professional in the industry. An outstanding real estate agent is well-rounded, continually refining their skills to advocate for their clients effectively. Beyond advocacy, agents should also serve as knowledgeable advisors. Here are the top 15 skills every real estate agent should master: Chapters Communication Problem Solving Negotiation Time Management Local Knowledge Active Listening Persistence Marketing Skills Patience & Empathy Teaching Ethics Tech Savviness Resilience People Skills Networking Skills 1. Communication Effective communication is essential, particularly in initial interactions. Agents must be prompt in their responses and keep all parties informed throughout the transaction process. This includes regular updates and coordination with other agents, closing attorneys, lenders, inspectors, and various service providers. 2. Problem Solving Challenges are inevitable. A proficient agent is always prepared with multiple strategies to tackle unexpected issues, whether they relate to property defects, financing setbacks, or appraisal discrepancies. 3. Negotiation Whether representing buyers or sellers, strong negotiation skills are vital. Agents must strive to secure the best possible terms for their clients to maximize their satisfaction and financial outcome. 4. Time Management Real estate demands flexibility and efficiency. Agents must adeptly manage their schedules to accommodate showings, offer preparation, and client queries promptly. 5. Local Knowledge Understanding the nuances of local markets in Rhode Island and Massachusetts can significantly benefit clients. From community features to market trends, local insight is invaluable, especially for those relocating from other regions. 6. Active Listening An agent’s ability to truly listen and understand client needs is fundamental. This ensures that clients’ preferences and objectives are prioritized throughout the buying or selling process. 7. Persistence Determination is crucial, especially when negotiating or addressing client concerns. Persistence in communication and problem-solving can make a significant difference in achieving client goals. 8. Marketing Skills Effective marketing goes beyond listing a property. Agents should leverage various platforms to attract potential buyers and engage with the community to enhance their listing’s visibility. 9. Patience & Empathy Real estate transactions can be emotionally charged. A patient and empathetic approach helps agents support their clients through ups and downs, providing comfort and guidance when needed. 10. Teaching Educating clients about the real estate process is crucial, especially for first-time buyers or sellers. An informative agent demystifies the complexities of real estate, empowering clients to make informed decisions. 11. Ethics Integrity and loyalty are non-negotiable. Adhering to ethical standards and maintaining confidentiality are essential for building trust and ensuring fair dealings. 12. Tech Savviness Proficiency in modern technology and social media is necessary for effective communication, marketing, and transaction management in today’s digital world. 13. Resilience The ability to stay motivated and positive, even in challenging situations, is key. An agent’s resilience can reassure clients and help navigate the often turbulent real estate landscape. 14. People Skills Real estate is fundamentally about relationships. Agents must be adept at interacting with a diverse range of people, managing different personalities without conflict. 15. Networking Skills A robust network can provide clients with additional resources and opportunities. Regular networking also helps agents stay current on industry trends and best practices. Conclusion These skills are pivotal for any real estate agent striving to excel in Rhode Island and Massachusetts. When selecting an agent, ensure they demonstrate these competencies to effectively handle your real estate needs. If you're looking to buy or sell property in these areas, consider engaging an agent who exemplifies these qualities to ensure a smooth and successful transaction.
How to Cut Costs When Moving: A Comprehensive Guide

How to Cut Costs When Moving: A Comprehensive Guide   Embarking on a move is an exciting endeavor, but it can also be daunting, especially when considering the financial implications. Whether you're relocating within Rhode Island or making the leap to Massachusetts, here are ten savvy strategies to trim down your moving expenses:   Chapters Obtain Multiple Estimates Opt for Self-Packing Choose Off-Peak Moving Times Minimize Supply Expenses Declutter and Sell Unwanted Items Evaluate DIY Moving Negotiate for Competitive Rates Pack Strategically to Maximize Space Understand Your Insurance Options Explore Shipping Alternatives 1. Obtain Multiple Estimates Gathering estimates from various moving companies is crucial for making an informed decision and potentially saving a significant sum. Aim to collect quotes from at least three movers, prioritizing in-person interactions for accuracy and reliability. Prospective movers should be wary of companies reluctant to provide upfront quotes or demanding full payment in advance. By comparing estimates, you can not only identify the most competitive prices but also gauge the professionalism and trustworthiness of each company. 2. Opt for Self-Packing While enlisting professional packers may seem convenient, it often comes with a hefty price tag. Instead, consider packing your belongings yourself to slash costs significantly. Allocate ample time for packing, tackle one room at a time, and employ meticulous labeling to streamline the process.   Involving family members, including children, can turn packing into a collaborative and engaging activity while minimizing expenses. On average, full-service packing and unpacking services can set you back around $700 per hour, making self-packing an attractive alternative.   3. Choose Off-Peak Moving Times   To avoid inflated prices and secure flexible scheduling options, aim to move during off-peak seasons. While the spring and summer months witness a surge in moving activity, late fall and winter offer more favorable rates and greater availability among moving companies.   Although inclement weather and reduced daylight hours may present logistical challenges, the potential cost savings outweigh the inconveniences. By planning your move strategically, you can capitalize on lower prices and enjoy a smoother transition.   4. Minimize Supply Expenses   Purchasing packing supplies can quickly escalate your moving budget, but there are ways to mitigate this expenditure. Rather than buying brand-new materials, explore options for borrowing or renting supplies from friends, family, or rental companies like U-Haul.   Platforms like Facebook Marketplace often feature free or low-cost packing boxes in good condition, providing a budget-friendly alternative to buying new. By harnessing these resources, you can minimize supply costs without compromising on packing quality.   5. Declutter and Sell Unwanted Items   Streamlining your belongings before the move not only lightens the load but also boosts your budget through sales proceeds. Consider hosting a yard sale or leveraging online marketplaces to offload items you no longer need or use.   By purging unnecessary belongings, you'll not only reduce packing efforts but also lower transportation costs. Prioritize decluttering as part of your moving preparations to optimize space and savings.   6. Evaluate DIY Moving   While hiring professional movers offers convenience, moving yourself presents a more economical alternative, particularly for local relocations. Assess the feasibility of a DIY move based on factors such as distance, volume of belongings, and personal preferences.   For smaller-scale moves, renting a moving truck or soliciting assistance from friends and family can yield substantial savings. However, it's essential to weigh the pros and cons and consider your comfort level with handling the logistics independently.   7. Negotiate for Competitive Rates   Don't hesitate to negotiate with moving companies to secure the best possible deal. After obtaining multiple estimates, leverage competing offers to negotiate favorable terms with your preferred mover.   While some companies may be open to discounts or promotions, ensure that all estimates align in terms of services and itemized costs. Negotiating effectively can result in significant savings without compromising on quality or reliability.   8. Pack Strategically to Maximize Space   Strategic packing not only minimizes the number of boxes required but also optimizes space within each container. Prioritize efficient packing techniques, such as placing heavier items in smaller boxes and grouping similar items.   By maximizing space utilization and minimizing box count, you'll not only reduce moving costs but also minimize the risk of damage during transit. Invest time and effort in strategic packing to reap long-term savings and streamline the moving process.   9. Understand Your Insurance Options   Moving insurance provides invaluable protection against potential losses or damages during transit. Familiarize yourself with available insurance options, including basic valuation coverage offered by moving companies and supplemental policies for added peace of mind.   Even if you opt for a DIY move, securing adequate insurance coverage ensures financial protection against unforeseen mishaps. Prioritize insurance considerations to safeguard your belongings and mitigate potential risks.   10. Explore Shipping Alternatives   For individuals with minimal belongings or specific shipping requirements, courier services like UPS, FedEx, and USPS offer cost-effective solutions. Shipping boxes can be a viable alternative to traditional moving methods, particularly for smaller loads or long-distance moves.   Evaluate shipping options based on factors such as box weight, distance, and delivery timelines to identify the most economical solution. By exploring alternative shipping methods, you can tailor your approach to suit your budget and logistical needs.   In Conclusion   Moving need not be a financial burden when approached strategically. By implementing these ten tips, you can trim down expenses and navigate your relocation with confidence. Whether you're moving within Rhode Island or venturing to Massachusetts, prudent planning and resourcefulness are key to a successful and budget-friendly move.
Creating a Handicap-Accessible Home in Rhode Island and Massachusetts

Creating a Handicap-Accessible Home in Rhode Island and Massachusetts Are you considering making your home handicap accessible? Here are ten effective ways to transform your living space into a comfortable environment for individuals with disabilities. Enhancing your home to accommodate individuals with disabilities is crucial for their safety and independence in completing daily tasks. Unlike newly constructed homes, most existing houses lack the necessary modifications for accessibility. Therefore, understanding the essential adjustments needed to ensure a high quality of life for individuals with disabilities living in the home is imperative. In the United States, millions of adults live with disabilities, with a significant portion experiencing mobility challenges, such as difficulty walking or climbing stairs. Both adults and children with disabilities may require specific home modifications and improvement projects to ensure their safety and peace of mind when residing in a new environment. Fortunately, many of these modifications can be implemented easily without professional assistance. The initial step in creating a handicap-accessible home is conducting a thorough assessment of the property to identify necessary modifications. This process becomes especially vital for two-story homes, typical in Rhode Island and Massachusetts. Here are ten effective strategies for creating a handicap-accessible home, along with relevant information on costs and measurements based on guidelines provided by the Americans with Disabilities Act (ADA). 1. Install a Stairlift For homes with multiple levels, installing a stairlift can greatly enhance accessibility for individuals with mobility impairments. While this investment may range from $2,500 to $8,000, it significantly improves the quality of life for those with mobility challenges. Before installation, consider potential limitations, especially in narrow stairways, and evaluate the need for multiple stairlifts for homes with multiple levels. 2. Widen Doorways Doorways should provide ample space for wheelchairs, walkers, and other mobility aids. According to ADA guidelines, door openings should measure a minimum of 32 inches. While widening doorways may incur expenses, it is essential for ensuring accessibility throughout the home. 3. Install Grab Bars Grab bars offer essential support and stability, particularly in areas like bathrooms. These safety devices assist individuals with balance and mobility issues. With various types available, including straight, wave, and textured grab bars, they can be strategically installed throughout the home for added safety. 4. Replace Steps With Ramps Replacing traditional steps with wheelchair-accessible ramps at entrances is crucial for facilitating easy access. Whether opting for portable or permanent ramps, adherence to ADA guidelines, such as a recommended slope of 1:12, ensures optimal accessibility. 5. Lower Sinks Traditional sink heights may pose challenges for wheelchair users. Installing lowered sinks with adequate knee clearance adheres to ADA standards and promotes accessibility for individuals with mobility disabilities. 6. Replace Knob Handles Round doorknobs can be challenging for individuals with disabilities, necessitating the installation of lever-style handles for easier operation. ADA-compliant handles should be positioned within specified height ranges to accommodate diverse users effectively. 7. Lower Closet Rods Adjusting closet rods to lower heights ensures ease of access for individuals with mobility impairments. Adequate floor space and proximity to the user adhere to ADA guidelines, promoting convenience and accessibility. 8. Eliminate Bathing Barriers Creating a barrier-free bathing environment minimizes safety hazards and enhances accessibility for individuals with disabilities. Considerations such as slip-resistant surfaces, grab bars, and clear floor space are essential for ADA-compliant bathrooms. 9. Consider Furniture Placement Thoughtful furniture placement is crucial for optimizing accessibility within the home. By ensuring ample space for wheelchair and walker maneuverability, homeowners can create a safe and accessible living environment. 10. Introduce Smart Home Technology Smart technology offers innovative solutions to enhance independence and quality of life for individuals with disabilities. Devices such as voice assistants and smart home systems provide convenient access to various household functions, promoting autonomy and accessibility. By incorporating these strategies, homeowners in Rhode Island and Massachusetts can create welcoming and accessible environments for individuals with disabilities. Investing in these modifications not only improves the quality of life for residents but also adds value to the property for potential resale. Methodology This guide utilized data and insights from various sources, including home improvement retailers, accessibility standards outlined by the ADA, and expert recommendations to compile effective strategies for creating handicap-accessible homes. FAQs How do you design a home for wheelchair users? Designing a wheelchair-accessible home involves implementing features such as accessible entrances, open floor plans, and modified kitchens and bathrooms to ensure ease of use and maneuverability for individuals with mobility impairments. What is a disability-friendly environment? A disability-friendly environment encompasses physical spaces that prioritize accessibility and accommodate individuals with disabilities by eliminating barriers to entry and facilitating ease of movement and participation. What are the barriers for people with disabilities? Common barriers for individuals with disabilities include physical obstacles, communication challenges, attitudinal barriers, policy constraints, programmatic limitations, social stigma, and transportation issues. Final Thoughts Creating a handicap-accessible home is a rewarding endeavor that enhances the lives of individuals with disabilities by promoting independence and safety. These modifications not only benefit current residents but also contribute to the overall accessibility and inclusivity of the community.
Considering Adding a Home Addition in Rhode Island or Massachusetts? Discover the Costs!

Considering Adding a Home Addition in Rhode Island or Massachusetts? Discover the Costs!   Are you contemplating the idea of expanding your living space with a home addition? Whether you're eyeing an extra room, a bathroom upgrade, or a complete suite, understanding the costs involved is crucial. Dive into the details to make informed decisions about your Rhode Island or Massachusetts home addition project. Expanding your home comes with numerous benefits, including increased square footage, enhanced property value, and improved functionality. However, embarking on a home addition requires careful planning and consideration of various costs. The cost of a home addition can fluctuate based on factors such as the size of the space, materials used, labor expenses, and project complexity. While basic renovations offer some improvements, a well-executed home addition can be transformative. In Rhode Island and Massachusetts, the average cost of a home addition ranges between $21,000 and $73,500, with an average of approximately $46,000. However, these figures can vary significantly based on specific project requirements. Let's delve into the breakdown of costs associated with different types of home additions: Chapters Adding a New Room Cost Considerations Factors Affecting Home Addition Costs Tips to Control Costs Return on Investment (ROI) 1. Adding a New Room Bedroom Adding a standard 9 by 12-foot bedroom can cost between $8,600 and $21,600, while a complete bedroom suite with a bathroom may exceed $100,000. Bathroom Costs typically range from $6,200 to $15,500, depending on square footage and required plumbing and electrical work. Living Room Expect to invest between $17,300 and $43,200 for an 18 by 12-foot living room addition, considering HVAC and electrical requirements. Kitchen Budget approximately $100 to $300 per square foot for kitchen additions, factoring in additional electrical wiring costs. Mudroom Creating a 50-square-foot mudroom may cost between $4,000 and $18,000, including exterior door installation and waterproof flooring. Finished Basement Costs range from $2,800 to $34,500, covering plumbing, insulation, drywall, lighting, and heating. Finished Attic Budget between $4,600 and $16,000 for attic finishing, accounting for insulation, ventilation, drywall, and flooring. 2. Cost Considerations Labor Includes payments to contractors, skilled professionals, and construction-related labor costs. Materials Cover expenses for building materials such as lumber, concrete, roofing, windows, doors, insulation, siding, and flooring. Architectural and Design Fees Hiring professionals for detailed plans and blueprints is an upfront cost. Additional Costs Include homeowner association fees, increased property taxes, insurance premiums, and temporary housing expenses during construction. 3. Factors Affecting Home Addition Costs Project Size and Scope Square footage, material quality, and room type influence costs, with labor being a significant expense. Location Consider placement within the property and necessary accommodations for utilities and structures. Labor Labor costs typically account for 50-60% of total expenses, varying based on professional rates and project complexity. General Contractor 10-20% of project Architect 5-10% of project Plumber $45-$200 an hour Electrician $50-$150 an hour Carpenter $75-$100 an hour Materials Costs vary depending on the design and specifications, including foundation, framing, drywall, insulation, and flooring. Permits and Zoning Budget for building permits and ensure compliance with local zoning laws and regulations. 4. Tips to Control Costs Establish a realistic budget and plan meticulously to avoid unexpected expenses. Opt for simpler designs to minimize complexity and costs. Maximize existing space before adding square footage. Prioritize essential features over luxuries to stay within budget. Time your project during off-peak construction seasons to reduce labor expenses. 5. Return on Investment (ROI) The ROI varies depending on factors like addition size, materials, labor costs, and project complexity. Adding a bathroom yields an average ROI of 63%, while a primary bedroom suite offers a 56% ROI. High-quality finishes may enhance ROI, while budget-friendly options may yield lower returns. In conclusion, a well-planned home addition in Rhode Island or Massachusetts can elevate your living space and property value. While it requires a significant investment, it's often more affordable and less stressful than relocating. Explore various options, conduct thorough research, and consult professionals to embark on a successful home addition journey.
10 Best Advice on Selecting a Professional Moving Company

Advice on Selecting a Professional Moving Company   Are you contemplating hiring a professional mover? Follow these ten invaluable tips to navigate through the process smoothly and ensure a hassle-free relocation!   Moving, whether it's within Rhode Island and Massachusetts or to another state, can be an overwhelming experience, often fraught with stress and exhaustion. Whether you're relocating to a trendy neighborhood in Providence or to a new city altogether, finding a trustworthy moving company can alleviate much of the burden associated with this significant life event.   From the arduous task of packing to ensuring that every item on your moving checklist is ticked off, it's no surprise that moving ranks as one of life's major stressors. For families with children, frequent moves can disrupt their schooling and social lives, adding an extra layer of complexity to the process.   Enlisting the services of a professional mover can lift the weight off your shoulders, allowing you to focus on other essential aspects of your move. But with countless moving companies vying for your business, how do you choose the right one that aligns with your needs and budget? Fear not, as this guide offers ten expert tips to help you find experienced and dependable movers, particularly if you're undertaking an interstate move.   Here's what you need to know when seeking out a professional mover:   Chapters Seek Recommendations from Friends and Family Assess Your Moving Requirements Obtain Multiple Estimates Conduct Thorough Research Clarify Potential Additional Fees Inquire About Packing Services Discuss Moving Insurance Don't Shy Away from Asking Questions Consider Moving During Off-Peak Seasons Ensure Clarity on Items to be Moved 1. Seek Recommendations from Friends and Family Harness the power of word-of-mouth by soliciting referrals from friends and family. Hearing about positive experiences from those you trust can help narrow down your options and instill confidence in your choice of movers. 2. Assess Your Moving Requirements Every move is unique, so it's crucial to assess your specific needs before selecting a moving company. Consider factors such as the distance of your move, the volume of belongings, and whether you require additional services like packing assistance. 3. Obtain Multiple Estimates To ensure you're getting the best value for your money, obtain estimates from at least three moving companies. This not only helps in cost comparison but also provides room for negotiation, potentially securing you a better deal. 4. Conduct Thorough Research Before committing to a moving company, conduct thorough research to verify their credentials and track record. Online reviews and testimonials can offer valuable insights into the quality of service provided by a prospective mover. 5. Clarify Potential Additional Fees Don't get caught off guard by hidden fees. Clarify any additional charges, such as packing materials, fuel surcharges, or specialized services, to avoid unpleasant surprises on moving day. 6. Inquire About Packing Services Consider opting for packing services offered by the moving company to alleviate the stress of preparing your belongings for transit. While it may incur an extra cost, the convenience and peace of mind it provides can be well worth it. 7. Discuss Moving Insurance Protect your belongings during transit by discussing moving insurance options with your chosen moving company. Whether opting for released value protection or full value protection, ensure your possessions are adequately covered against loss or damage. 8. Don't Shy Away from Asking Questions Ask pertinent questions to gauge the suitability of a moving company for your needs. From licensing and insurance to cancellation policies and equipment provision, clarity is key before signing any contracts. 9. Consider Moving During Off-Peak Seasons To potentially save on moving costs, consider scheduling your move during off-peak seasons, such as winter. Not only are prices likely to be lower, but you'll also have greater flexibility in terms of available moving dates. 10. Ensure Clarity on Items to be Moved Communicate clearly with your chosen mover regarding the items to be transported. Any additions or modifications to the initial inventory may incur additional charges, so it's essential to establish clear expectations from the outset. Conclusion Moving can be a daunting endeavor, but with the right professional mover by your side, the process can be significantly streamlined. By following these ten tips, you can confidently select a moving company that meets your needs and ensures a seamless transition to your new Rhode Island or Massachusetts home. If you're embarking on a move to Providence or Boston and need assistance finding your dream home, reach out to the experts at Duckworth Homes. We're here to guide you every step of the way and address any questions or concerns you may have.
Top 7 Pool Statistics and Trends [2024]

Top 7 Pool Statistics and Trends [2024]   Considering a pool installation or upgrade? Dive into the latest statistics and trends that are shaping the pool landscape this year.   In the sunnier seasons, a backyard pool can transform a mundane space into a vibrant retreat. According to the Pool & Hot Tub Alliance, the U.S. is home to over 6,100,000 residential in-ground pools. As we kick off 2024, it's crucial for homeowners to stay informed about key pool statistics and upcoming trends influenced by observations from the previous year and expert forecasts. Across the U.S., there are over 10.7 million swimming pools, with 59% in-ground and 41% above-ground. When selecting a pool, it's important to ensure it aligns with both your lifestyle and budget. The average pool installation costs around $35,000 and can significantly increase home value—potentially adding up to 7% in value or about $28,000 on a $400,000 property. Choosing the right pool for you involves personal preference and functionality, ranging from diving and swimming to lounging and tanning. Before deciding, consider how you plan to use your pool. Installing a pool can be an investment, enhance family time, or even make working from home more enjoyable. Here are the key pool statistics and trends for 2024: Chapters Acrylic Pool Edge Single-Depth Pools Multi-Colored Pool Tile Designs Cocktail Pools Smart Technology Multi-Functional Pools Biophilic Designs 1. Acrylic Pool Edge Leading the trends are acrylic pool edges, turning ordinary pools into stunning features with a modern flair. These pools, reminiscent of infinity pools, offer a seamless edge appearance and allow for extensive customization. Acrylic is now favored for its large, durable, yet transparent panels. 2. Single-Depth Pools Gaining popularity, particularly in modern residences, single-depth pools are typically 4 to 6 feet deep—ideal for families prioritizing safety and reducing operational costs. These pools are versatile, catering to both leisure and light water sports. 3. Multi-Colored Pool Tile Designs For those who embrace bold aesthetics, multi-colored pool tiles allow personal expression right in your backyard. Moving away from traditional blue, homeowners now experiment with diverse colors and materials, enhancing visual appeal and uniqueness. 4. Cocktail Pools Perfect for entertainment and small spaces, cocktail pools, or plunge pools, offer a compact, luxurious pool experience without the commitment of a full-size pool. These pools are usually 3 to 4 feet deep, making them a practical and economical choice. 5. Smart Technology Today’s pools incorporate smart technologies, enhancing convenience through automated management systems for cleaning, heating, and chemical balance, all controlled via smartphone. This innovation reduces manual maintenance significantly. 6. Multi-Functional Pools These pools are designed to cater to various activities, equipped with features like slides and loungers, adapting as family dynamics change. Multi-functional pools often have varying depths to accommodate everything from diving to casual swimming. 7. Biophilic Designs Biophilic designs integrate natural elements, promoting harmony between your home and the outdoors. These designs are not only aesthetically pleasing but also low maintenance, incorporating materials like natural stone and wood. Methodology This analysis utilizes data from multiple sources, including industry associations and market research firms, to forecast the trends and developments in the pool industry for 2024. FAQ: Top Pool Statistics and Trends Future of Pools: Projected market growth, driven by technological advancements and increased consumer interest. New Technologies: Innovations like energy-efficient pumps are becoming standard, improving sustainability and reducing costs. Smart Pools: Automated systems that streamline maintenance and operation. Infinity Pools: Known for their edgeless design, offering a seamless visual merge with the surroundings. Conclusion No matter the type or style of pool you're considering, the key is to choose one that you'll love. As 2024 progresses, staying ahead of these trends will help you make informed decisions, whether for personal enjoyment or enhancing property value. For those exploring new properties in Rhode Island and Massachusetts, consider the pool options available, as these areas feature rapidly growing real estate markets with a variety of homes to fit different preferences and needs.
10 Summer Gardening Tips for Rhode Island and Massachusetts

Summer Gardening Tips for Rhode Island and Massachusetts Are you seeking ways to ensure your garden thrives during the summer heat? Here are ten strategies to help your garden flourish during the warmer months! With the arrival of warmer weather, it's time to prepare for the spring planting season and safeguard your garden against the challenges of summer. Gardening is a delightful outdoor pursuit, ideal for engaging the entire family. Whether you're constructing garden beds in your backyard or adorning your space with potted blooms, understanding how to nurture your plants through the summer is vital. In Rhode Island and Massachusetts, summers can bring intense heat and humidity, posing risks to your plants without proper care. Follow these ten summer gardening tips: Chapters Opt for the Right Plants Water Thoughtfully Prune with Caution Provide Shade Embrace Mulching Shield from Wind Limit Fertilizer Use Protect Potted Plants Incorporate Compost Weed Regularly 1. Opt for the Right Plants Selecting plants suited to your local climate is crucial for a thriving garden. Look for varieties that can withstand the heat prevalent in Rhode Island and Massachusetts during the summer months. Timing is key when planting. Aim for late spring to early summer for optimal growth. Ideal warm-season crops for these regions include tomatoes, peppers, squash, cucumbers, beans, and watermelon. 2. Water Thoughtfully Proper watering is essential for your garden's survival in the summer heat. Water your garden early in the day or late in the evening to minimize evaporation. During hot spells, ensure deep watering at least three times a week for in-ground plants. Seedlings may require watering twice daily until established. Avoid watering in full sun to prevent leaf scorch. Consider drip irrigation for larger gardens and monitor potted plants closely, watering them as needed throughout the day. 3. Prune with Caution While pruning is beneficial for plant health, avoid heavy pruning during periods of high heat. Pruning in summer can expose vulnerable parts of the plant to excessive sunlight, leading to heat damage. If pruning is necessary, do so during cooler parts of the day and keep it minimal to prevent stress on the plant. 4. Provide Shade Protect your plants from direct sunlight and extreme heat by providing shade when necessary. Shade cloths are effective in reducing temperatures and preventing sunburn. Certain crops, such as leafy greens and herbs, thrive in partially shaded areas and can benefit from shade during the hottest parts of the day. 5. Embrace Mulching Mulching is an excellent way to combat summer heat in your garden. Mulch helps regulate soil temperature, retain moisture, and suppress weed growth. Ensure mulch is applied properly, leaving space around plant stems to prevent suffocation. Reapply mulch as needed throughout the season. 6. Shield from Wind Strong winds can damage delicate plants during summer storms. Create wind barriers using trees, shrubs, or sturdy materials to protect your garden beds. Secure tall plants with stakes or trellises to prevent them from bending or breaking in strong gusts. 7. Limit Fertilizer Use During summer, reduce or eliminate fertilizer application to avoid stressing plants further. Over-fertilization can lead to nutrient imbalances and hinder plant growth in hot conditions. Focus on maintaining soil moisture and providing adequate nutrients through compost and organic matter. 8. Protect Potted Plants Potted plants are more susceptible to heat stress and dehydration. Move them to shaded areas as needed and water them frequently to prevent drying out. Consider using larger pots with ample drainage to help regulate soil moisture levels. 9. Incorporate Compost Boost your garden's health by incorporating compost throughout the summer months. Compost enriches soil, improves water retention, and enhances nutrient availability for plants. Add compost to existing beds or containers to replenish nutrients and support healthy growth. 10. Weed Regularly Keep your garden beds weed-free to prevent competition for resources and minimize the risk of pests and diseases. Hand-pull weeds or use targeted treatments to maintain a healthy garden environment. By following these tips, you can ensure your garden thrives throughout the summer, providing you with a bountiful harvest and a beautiful outdoor space to enjoy. Methodology We gathered insights from various reliable sources, including local gardening associations, university extensions, and agricultural publications, to compile these summer gardening tips tailored to Rhode Island and Massachusetts. In conclusion, gardening in the summer can be a rewarding and enjoyable experience, offering numerous benefits for both body and mind. Whether you're a seasoned gardener or just starting out, these tips will help you cultivate a vibrant and resilient garden that flourishes despite the summer heat.  
Buyer's Agent Insights: Rhode Island and Massachusetts

Buyer's Agent Insights: Rhode Island and Massachusetts Are you curious about buyer's agents and their role in your home search? Dive into the realm of buyer's agents and discover key insights tailored to the Rhode Island and Massachusetts housing markets. A buyer's agent is your expert companion in the real estate journey, dedicated to helping you navigate the complexities of finding your ideal home. Serving as your trusted advisor, a buyer's agent plays a pivotal role in facilitating your home purchase experience. From the initial search to the final closing, the process of buying a home can be intricate and time-consuming. Whether you're a first-time buyer or a seasoned homeowner, a buyer's agent offers invaluable guidance throughout the entire process. Here's what you need to know about buyer's agents in Rhode Island and Massachusetts: Chapters Understanding Buyer's Agents Demographics of Buyer's Agents Roles and Responsibilities Buyer's Agent vs. Listing Agent Pros and Cons Questions to Ask Buyer's Agents Real Estate Statistics in 2024 1. Understanding Buyer's Agents A buyer's agent is a professional who advocates for the buyer's interests in real estate transactions. Unlike listing agents who represent sellers, buyer's agents focus solely on guiding buyers through the purchasing process. Key Points about Buyer's Agents: Buyer's agents work closely with clients to comprehend their preferences and requirements, curating a list of suitable properties. They represent buyers in negotiations, coordinate property inspections, and oversee all aspects of the buying process. While some agents may represent both buyers and sellers, it's crucial to find an agent who prioritizes your interests. 2. Demographics of Buyer's Agents Insights into the demographics of buyer's agents offer valuable perspectives for both agents and clients alike. Here are some key statistics from Rhode Island and Massachusetts: Gender Ratio: 44% Male, 56% Female Average Age: 47.6 years Educational Background: Bachelor's degree is the most common, followed by associate degrees and high school diplomas. Understanding these demographics provides insights into market dynamics and helps buyers make informed decisions. 3. Roles and Responsibilities Buyer's agents play a multifaceted role in the home-buying process. Beyond guiding you through the journey, they: Identify suitable properties based on your budget and preferences. Schedule property tours and provide insights into neighborhoods and local amenities. Assist in making competitive offers and negotiate terms with sellers. Offer referrals to other professionals such as real estate attorneys and inspectors. Their expertise and guidance are invaluable assets in navigating the complexities of purchasing a home. 4. Buyer's Agent vs. Listing Agent While both buyer's agents and listing agents are essential players in real estate transactions, they serve distinct roles: Buyer's agents represent the buyer's interests, ensuring they secure the best deal and terms. Listing agents work on behalf of sellers, aiming to maximize sale profits and minimize contingencies. Regardless of your position in the transaction, having a dedicated professional by your side streamlines the process and safeguards your interests. 5. Pros and Cons Consider the following pros and cons of working with a buyer's agent: Pros: Advocates for your best interests Expertise in real estate market dynamics Helps identify potential issues and find the perfect home Offers valuable insights into local areas and market trends Cons: Potential obligation under a buyer agency agreement Challenges in finding the right agent Overall, the benefits of having a buyer's agent far outweigh any drawbacks, especially in competitive housing markets like Rhode Island and Massachusetts. 6. Questions to Ask Buyer's Agents When selecting a buyer's agent, ask pertinent questions to ensure they align with your needs: Availability and Schedule Communication and Working Style House Hunting Strategies Negotiation Expertise Compatibility and Trustworthiness Additionally, request references to gauge their track record and client satisfaction. 7. Real Estate Statistics in 2024 Keeping abreast of real estate statistics provides valuable insights into market trends and dynamics: Over 3 million active real estate licensees in the United States Typical home sellers have owned their homes for an average of 8 years Majority of buyers (89%) purchase homes through real estate agents High satisfaction rate (90%) among buyers with their agents These statistics underscore the importance of leveraging professional expertise in real estate transactions. In conclusion, a buyer's agent serves as your trusted advisor and advocate in the home-buying process. Their expertise, insights, and network are invaluable assets in navigating the Rhode Island and Massachusetts housing markets. If you're considering a move or sale, our team at Duckworth Homes is here to provide unparalleled support and guidance tailored to your needs.
10 Tips to Save on Cooling Costs in Rhode Island and Massachusetts

10 Tips to Save on Cooling Costs in Rhode Island and Massachusetts   Are you looking for ways to slash your cooling expenses? Dive into these ten simple strategies to trim down your cooling costs. Summer days in Rhode Island and Massachusetts are synonymous with sunshine and outdoor fun, but they often come with a spike in energy bills as temperatures soar. Air conditioning becomes a necessity for homeowners seeking refuge from the heat, but the associated costs can quickly escalate. Extended use of air conditioners can lead to exorbitant energy bills. In fact, air conditioning accounts for approximately 6% of the total electricity consumed in the United States, translating to a staggering annual cost of around $29 billion for homeowners. Not only does this take a toll on the environment, but it also burdens your finances. If you're a first-time homeowner, you might be surprised by the additional expenses like utility bills, HOA fees, and interest rates. It's crucial to be prepared to cut costs across various expenditure categories. With more people working remotely, finding a comfortable indoor temperature without breaking the bank can be challenging. Thankfully, there are numerous cost-effective methods to keep your home cool and cozy. Each of these tips works best when implemented together to effectively reduce cooling expenses during the sweltering summer months. While being a first-time homeowner might seem daunting, it doesn't have to be. By following these straightforward tips, you can keep your home comfortably cool while saving money. Read on to discover how you can lower your cooling costs in Rhode Island and Massachusetts. Chapters Install a Programmable Thermostat Close Curtains and Blinds Seal Cracks and Gaps Utilize Ceiling Fans Clean or Replace Air Filters Install Weather Stripping Insulate the Attic Install Heat Control Window Film Maintain Your HVAC System Limit Heat-Producing Appliances 1. Install a Programmable Thermostat Traditional thermostats require manual adjustments, which can contribute to higher cooling expenses. Switching to a programmable or smart thermostat can significantly decrease your cooling costs by automating energy-saving settings. Programmable thermostats allow you to preset temperatures for different times of the day, eliminating the need for constant adjustments. According to the Department of Energy, lowering your thermostat by 7-10°F for 8 hours a day can save up to 10% annually on heating and cooling costs. Investing in a smart thermostat offers even greater control and energy savings. 2. Close Curtains and Blinds A simple yet effective way to reduce cooling costs is by keeping curtains and blinds closed during the hottest parts of the day. Open curtains and blinds allow sunlight to penetrate, increasing indoor temperatures and forcing your air conditioner to work harder. Opt for light-colored curtains and blinds, as they reflect heat and light more effectively while still allowing natural light into your home. 3. Seal Cracks and Gaps Before moving into your new home, take the time to seal any cracks or gaps around windows, doors, and other openings. These small gaps can allow cool air to escape and warm air to infiltrate your home, increasing your cooling expenses. If you've already moved in, conduct a thorough inspection to identify and seal any leaks. Enhancing your home's airtightness will reduce the workload on your air conditioning system. 4. Utilize Ceiling Fans Ceiling fans are a cost-effective way to circulate cool air throughout your home, allowing you to maintain a comfortable temperature while reducing your reliance on air conditioning. However, be mindful of leaving fans running unnecessarily, as this can contribute to higher energy bills. Consider investing in portable fans for targeted cooling in specific areas of your home. 5. Clean or Replace Air Filters Dirty air filters can obstruct airflow and cause your air conditioning unit to operate inefficiently. Regularly check and clean or replace your air filters to ensure optimal performance and energy efficiency. This simple maintenance task can significantly improve the efficiency of your HVAC system, reducing your cooling costs. 6. Install Weather Stripping In addition to sealing cracks and gaps, installing weather stripping around doors and windows can further minimize air leaks, improving your home's energy efficiency. Focus on areas exposed to prevailing winds to maximize the effectiveness of weather stripping. By reducing air infiltration, you can lower your cooling costs and enhance indoor comfort. 7. Insulate the Attic Proper attic insulation is essential for minimizing heat transfer between the exterior and interior of your home. Inadequate attic insulation can result in increased cooling expenses as your air conditioning system works harder to maintain comfortable temperatures. Investing in attic insulation, if not already in place, can yield significant long-term savings on cooling costs. 8. Install Heat Control Window Film Heat control window film can help reflect sunlight and reduce heat gain in your home, particularly in rooms exposed to direct sunlight. This cost-effective solution allows you to enjoy natural light without compromising on comfort or energy efficiency. Consider applying heat control window film to windows facing the sunniest areas of your home for maximum impact. 9. Maintain Your HVAC System Regular maintenance of your HVAC system is crucial for optimal performance and energy efficiency. Schedule routine inspections, cleanings, and filter replacements to ensure that your system operates efficiently and effectively. Address any issues promptly to prevent costly repairs and maximize energy savings throughout the cooling season. 10. Limit Heat-Producing Appliances Appliances such as ovens and clothes dryers can generate significant heat, increasing the burden on your air conditioning system. To minimize cooling costs, avoid or limit the use of heat-producing appliances during the hottest parts of the day. Opt for alternative cooking methods, such as grilling outdoors or using a microwave, to reduce indoor heat levels and alleviate strain on your cooling system. By implementing these strategies, you can effectively reduce cooling costs while maintaining a comfortable indoor environment in Rhode Island and Massachusetts. Start saving on your energy bills today with these simple and practical tips. Frequently Asked Questions: Q: What is the most affordable way to cool a house? A: Budget-friendly cooling solutions include using ceiling fans, servicing your air conditioning unit,strategically placing plants near windows, and minimizing the use of heat-producing appliances. Q: What is the optimal temperature to set for cooling? A: Aim for a temperature setting around 68°F to 70°F for optimal comfort and energy efficiency. Adjust the thermostat lower when you're asleep or away from home to save on cooling costs. Q: Are fans more economical than air conditioning? A: Fans consume less energy than air conditioners, making them a more economical cooling option for many homeowners. Q: Do fans contribute to higher electricity bills? A: Leaving fans running constantly can increase monthly utility bills. To save on energy costs, turn off fans when not in use or when you're away from home for an extended period. Q: How much does it cost to install a cooling system in a house? A: The cost of installing a new HVAC system can vary widely depending on factors such as system size, efficiency rating, and installation complexity. On average, homeowners can expect to spend between $5,000 and $34,000 for a new cooling system, including installation. In conclusion, cutting cooling costs is achievable with the right strategies and mindset. By implementing these tips, you can enjoy a comfortable home environment while saving money on energy bills in Rhode Island and Massachusetts.
Navigating the Real Estate Market: Buyer's Advantage vs. Seller's Advantage

Navigating the Real Estate Market: Buyer's Advantage vs. Seller's Advantage   Curious about the nuances between a buyer's market and a seller's market? Dive into the distinctions between these two market dynamics and equip yourself with essential insights.   Understanding the ebb and flow of the housing market can be pivotal for anyone involved in real estate transactions. Various factors contribute to whether the market favors buyers or sellers, influencing financial outcomes for all parties involved.   Grasping these differences and their implications can be a game-changer in the realm of home buying and selling. Shifts in supply and demand dictate whether it's a buyer's market or a seller's market, affecting pricing and negotiation dynamics.   Each market scenario offers its own set of advantages and challenges, often reflecting shifts in regional housing demands. Let's delve deeper into understanding the distinctive features of both buyer's and seller's markets.   1. What Constitutes a Buyer's Market?   In a buyer's market, the housing supply surpasses demand, leading to prolonged listing durations and stable or declining property prices. This scenario presents challenges for sellers while providing buyers with ample choices and potential cost savings.   A surplus of available properties gives buyers the upper hand, compelling sellers to compete by adjusting prices downward. Consequently, homes tend to linger on the market, requiring sellers to strategically position their listings to attract prospective buyers.     For Sellers: Price competitively to attract buyers Enhance curb appeal and staging Be flexible with closing costs Address necessary repairs promptly Implement robust marketing strategies For Buyers: Evaluate all available options meticulously Prioritize desired concessions Stay informed about available inventory Conduct thorough comparative analysis Monitor listing durations closely 2. Understanding a Seller's Market Conversely, a seller's market arises when demand outstrips housing supply, resulting in fewer available properties and heightened competition among buyers. In this scenario, sellers hold the advantage, with homes selling swiftly and often at prices exceeding listing values. The scarcity of listings prompts buyers to act decisively, sometimes offering more than the asking price to secure desired properties. Additionally, homes spend minimal time on the market, facilitating swift transactions and empowering sellers with greater negotiating leverage. For Sellers: Avoid imposing strict offer review deadlines Exercise discernment when assessing offers Review all offers meticulously Address buyer contingencies proactively Facilitate early mortgage approvals For Buyers: Act promptly to capitalize on opportunities Acknowledge the competitive landscape Exercise patience while exploring options Prioritize needs without compromising Obtain preapproval to strengthen offers 3. Determining Your Market Position Identifying whether you're in a buyer's or seller's market requires scrutiny of several key indicators: Real Estate Inventory - Assess the abundance or scarcity of available properties. Pricing Trends - Monitor fluctuations in asking prices to gauge market conditions. Recent Sales - Analyze comparable property sales to discern market dynamics. Days on Market - Track listing durations as a reflection of demand levels. Market Absorption Rate - Calculate the rate at which available properties are selling. While these assessments may seem daunting, consulting with a knowledgeable real estate agent can offer invaluable insights into your local market dynamics. 4. Key Distinctions Here's a quick rundown of the defining characteristics of buyer and seller markets: In a Buyer's Market: Homes linger on the market. Properties often sell at or below asking prices. Home prices may exhibit a downward trend. Housing inventory is abundant. In a Seller's Market: Homes sell rapidly. Properties frequently command prices at or above asking. Home prices tend to ascend. Housing inventory is scarce. 5. Navigating the Home Search Journey Understanding the typical home search process can enhance your preparedness: Leverage online resources for initial property exploration. Engage with real estate agents to navigate the market effectively. Recognize the value of reliable information sources. Embrace digital tools for comprehensive property evaluations. Prioritize satisfaction throughout the home-buying journey. Ultimately, comprehending the nuances of buyer's and seller's markets is essential for optimizing your real estate endeavors. Stay attuned to market trends and indicators to make informed decisions aligned with your objectives. Conclusion Navigating Real Estate Markets Effectively Real estate markets are dynamic and subject to constant flux, necessitating a nuanced understanding of buyer's and seller's market dynamics. Armed with insights into prevailing market conditions, buyers and sellers can optimize their strategies to achieve favorable outcomes. Whether you're contemplating a home purchase or gearing up for a sale, aligning your approach with prevailing market trends can enhance your chances of success. Embrace the ever-evolving nature of real estate markets, stay informed, and leverage expert guidance to navigate transactions effectively. If you're considering buying or selling a home in Rhode Island or Massachusetts, our team at Duckworth Homes is here to assist you every step of the way. Contact us today or visit our website to explore your real estate options with confidence.
10 Roles of a Real Estate Attorney

Roles of a Real Estate Attorney   Ever wondered about the pivotal duties of a real estate attorney? Here's a breakdown of ten significant responsibilities of these legal professionals!   A real estate attorney is a specialized legal expert licensed to handle all legal aspects involved in real estate transactions. They possess the necessary knowledge and experience to provide valuable insights to all parties engaged in buying or selling properties.   From document preparation to contract negotiation, the role of a real estate attorney encompasses various responsibilities, making them indispensable during real estate dealings.   Rhode Island and Massachusetts are among the states where the presence of a real estate attorney is mandatory during property closings. During this crucial phase, a real estate attorney scrutinizes and approves all aspects of the closing for the benefit of all parties involved.   The responsibility of covering the cost of a real estate attorney during closing depends on the negotiations within the real estate contract. Whether it's the buyer or seller, one of the parties typically bears this expense.   Engaging a real estate attorney during a transaction offers numerous benefits, albeit at a cost. On average, consulting a real estate attorney can incur fees of around $300 per hour. However, fee structures may vary, with attorneys often charging fixed hourly rates or specific fees for particular services like document drafting or attendance at closings.   Finding a reputable and proficient real estate attorney is crucial. Recommendations from friends or family and online reviews are valuable resources for identifying a suitable attorney.   Whether you're a buyer or seller, considering the hire of a real estate attorney, here are ten essential responsibilities they undertake:   Chapters Title Search Contract Preparation and Negotiation Facilitating Closings Handling Litigation Addressing Land Use Issues Managing Purchase Agreements Resolving Title Problems Assisting in Foreclosure Proceedings Handling Complex Transactions Drafting Legal Documents 1. Title Search Conducting a thorough title search is one of the primary duties of a real estate attorney. This process involves examining public records to ascertain a property's legal ownership, ensuring a smooth transfer of title during a purchase. 2. Contract Preparation and Negotiation Real estate attorneys are tasked with drafting contracts between parties involved in a property sale. They possess the legal authority to prepare and review all relevant documents and contracts, facilitating smooth negotiations. 3. Facilitating Closings In states like Rhode Island and Massachusetts, real estate attorneys play a vital role in overseeing closing procedures. They manage the final stages of transactions, ensuring the transfer of funds and adherence to contractual obligations. 4. Handling Litigation In cases of contractual breaches or disputes, real estate attorneys initiate and oversee legal proceedings, resolving conflicts through litigation. 5. Addressing Land Use Issues Real estate attorneys stay abreast of zoning and land use laws, providing essential guidance to buyers interested in properties subject to such regulations. 6. Managing Purchase Agreements Real estate attorneys prepare and review purchase agreements, ensuring that all terms and conditions are clearly outlined and agreed upon by both parties. 7. Resolving Title Problems When title issues arise, real estate attorneys intervene to rectify them, obtaining necessary legal documentation and coordinating with relevant parties. 8. Assisting in Foreclosure Proceedings During foreclosure processes, real estate attorneys represent and defend parties affected by foreclosure actions, safeguarding their interests and rights. 9. Handling Complex Transactions Real estate attorneys provide invaluable assistance in navigating intricate real estate transactions, offering legal expertise to address any complexities that may arise. 10. Drafting Legal Documents Real estate attorneys draft essential legal documents pertinent to real estate transactions, including purchase agreements, deeds, and mortgage notes, ensuring compliance with legal requirements. In conclusion, real estate attorneys fulfill a multitude of crucial responsibilities throughout the property transaction process. Though their services come at a cost, their expertise and guidance are invaluable, offering peace of mind and legal protection to buyers and sellers alike. When considering hiring a real estate attorney, prioritize reputation and recommendations to ensure a smooth and successful transaction. If you're planning to buy or sell property in Rhode Island or Massachusetts, reach out to the seasoned professionals at Duckworth Homes for expert guidance and assistance.
Decorating Your First Home in Rhode Island and Massachusetts

Decorating Your First Home in Rhode Island and Massachusetts   Embarking on the journey of decorating your first home in Rhode Island or Massachusetts? Here are ten invaluable interior decorating tips tailored for first-time homeowners in the New England region!   Moving into a new home is a thrilling experience, offering a fresh start and the freedom to infuse your personal style. For first-time homeowners in Rhode Island and Massachusetts, the process of making a house feel like a home is an exciting venture.   Decorating your home is a gradual journey that demands careful consideration. The choices made in the initial stages play a pivotal role in defining the overall aesthetic of your home. A thoughtfully designed space not only fosters coziness and relaxation but also enhances functionality and organization.   Whether you've purchased your first home post-college or after tying the knot, decorating can be both enjoyable and overwhelming. Once the new home is ready, devising a plan is crucial to transform an empty house into a warm and inviting space.   Check out these tailored interior decorating suggestions:   Chapters Establish a Budget Define Your Style Choose a Color Palette Start With Large Items First Do Not Buy Everything At Once Mix and Match Consider the Lighting Include Mirrors Scale Artwork To Your Wall Use Visual Tricks 1. Establish a Budget Creating a budget is a foundational step in decorating your first home in Rhode Island or Massachusetts. Homeownership comes with its expenses, and decorating adds to the costs. Having a budget or a rough estimate of your spending capacity on decor is essential. On average, homeowners may spend anywhere from $10,000 to $40,000 on decorations, depending on the quality of furnishings. If starting from scratch, especially after living with parents, costs might be higher as you gradually accumulate new furniture and decor. Creating a budget provides clarity on whether new items can be afforded or if alternatives like buying from local markets or used furniture stores are more suitable. 2. Define Your Style When decorating your first home, identifying your design style is paramount. From traditional to modern farmhouses, various design styles cater to different preferences. While perfection is not mandatory, choosing a style that resonates with you helps in selecting cohesive furniture and decor. Platforms like Pinterest offer inspiration to refine your style preferences. If you're moving with existing furniture, assess what complements your chosen style and discard items that don't align. 3. Choose a Color Palette Color plays a crucial role in evoking emotions and setting the mood in a home. Bright, warm colors stimulate energy, ideal for living rooms and kitchens, while cool colors create a calming ambiance, suitable for bedrooms and bathrooms. Selecting a color palette for your Rhode Island or Massachusetts home enhances the mood and injects personality into the space. The 60-30-10 color ratio is a common design principle, ensuring a balanced palette throughout the home. Consistency in color flow from room to room fosters unity and visual appeal. Consider existing colors, personal preferences, and design style when choosing your color palette. 4. Start With Large Items First Initiate the decorating process by focusing on large items or statement pieces. Essential, everyday furniture items like bedframes, living room sofas, and dining tables are considered investments that will likely stay with you for an extended period. Introducing these significant pieces first makes it easier to design the rest of the space around them, shaping the foundation of your dream home. 5. Do Not Buy Everything At Once Decorating is a gradual process, and it's unnecessary to purchase everything at once. Especially when working with a budget, recognize that completing your home decor may take months to years. Budget constraints and the search for specific pieces can delay the process. Decorating your first home is not a race; it's a continual journey of adding new pieces and furniture to reflect your evolving taste and lifestyle. 6. Mix and Match Avoid the pitfall of uniformity by embracing variety. Mixing and matching fabrics and textures inject personality and excitement into a space, creating a visually appealing and balanced environment. Stick to a color scheme to maintain coherence while experimenting with different decor elements. Focusing on a standout piece in each room and complementing it with smaller accent pieces allows for an interesting and eclectic look. 7. Consider the Lighting Lighting is a transformative element in interior design, influencing the overall tone of a room. Incorporate three levels of lighting in your Rhode Island or Massachusetts home: general lighting, task lighting, and accent lighting. Choose lighting based on the purpose of each room, ensuring a well-lit and visually appealing space. Overhead lighting and floor lamps create a bright and open feel, while table lamps with down lighting contribute to a warm and cozy ambiance. 8. Include Mirrors Mirrors serve as practical and statement-making interior design elements. They reflect light, making a room feel more spacious and open. Strategically placing mirrors in various rooms can significantly impact the overall aesthetics. Consider hanging mirrors above entryway tables, over living room couches, or leaning against walls to enhance the visual appeal of your Rhode Island or Massachusetts home. 9. Scale Artwork To Your Wall Artwork and photographs are essential components of home decor. When hanging art, ensure proper scaling to fit the wall space. As a general rule, art should be 1/2 to 3/4 the width of the wall or the furniture it hangs above. Follow the three-eighths rule for blank walls, ensuring the white space on either side of the artwork is approximately three-eighths of the width of the painting. If struggling to find a single piece, consider diptychs or triptychs for a cohesive look. 10. Use Visual Tricks Leverage visual tricks to enhance the perception of space in your Rhode Island or Massachusetts home. These optical illusions can make small rooms or spaces with low ceilings feel more expansive. Popular tricks include hanging curtains close to the ceiling to create the illusion of height. Methodology Information and data for these tips were drawn from various sources, including HomeGuide, Forbes, Architectural Digest, HGTV, and Artspace, tailored to the unique needs of first-time homeowners in Rhode Island and Massachusetts. FAQs: What is the first thing to do when decorating? The initial step in decorating is to create a plan. Once you have a layout for the room, you can delve into specific details like choosing artwork or determining rug sizes. What room should you decorate first? Start with the most frequently used rooms, such as the living room and bedrooms, when decorating your Rhode Island or Massachusetts home. In what order should decorating be done? Begin with fixed finishes like countertops and cabinets, followed by floor or wall coverings, significant furniture pieces, smaller furniture items, lighting, and accessories. In conclusion, turning a house into a home involves infusing your personality and favorite elements into the space. You don't need to be a professional designer to create functional and inviting rooms in your Rhode Island or Massachusetts home – just follow these tailored tips. If you're making the move and ready to buy your first home in the region, consider reaching out to the local experts for guidance.  
When's the Optimal Time to Purchase a Home?

When's the Optimal Time to Purchase a Home?   Are you pondering when the ideal moment to embark on your home-buying journey might be? Here's a comprehensive guide to determining the best time to purchase a house.   One of the most daunting aspects of purchasing a home is pinpointing the right moment to initiate the process. Unless you're facing an urgent need to relocate, discerning the optimal time to buy a house can be quite challenging, particularly for first-time buyers.   In February 2024 alone, there were 662,000 homes sold across the United States, indicating a substantial increase compared to the previous year. This surge suggests that the present moment might indeed be opportune for purchasing a home. Whether you're contemplating a move for career advancement, a change of scenery, educational pursuits, or any other reason, grasping the nuances of the best time to buy a house is crucial.   Ideally, the best time to buy a home is when real estate inventory is ample, but there's a dearth of prospective buyers. This scenario implies a less competitive housing market, potentially allowing you to acquire a property below its asking price. Nonetheless, the housing market is notoriously unpredictable, subject to fluctuation due to various influencing factors.   With that in mind, let's delve into determining the prime time for home buying, essential considerations, useful tips, and other pertinent information vital for prospective homebuyers.   Read on to unravel the optimal time for purchasing a house and how to gauge your readiness.   Chapters When's the Optimal Time to Purchase a Home? Navigating a Seller's Market vs. a Buyer's Market Key Considerations When Buying a Home How Can You Determine if Now's the Right Time to Buy a House? Practical Tips for Homebuyers 1. When's the Optimal Time to Purchase a Home? On average, March and June emerge as the most favorable months for home purchases. This is largely attributable to diminished competition and potentially more competitive pricing, offering the possibility of acquiring a property below its listed price. August typically boasts the highest volume of homes on the market, making it an optimal period for those seeking a wide array of options. Conversely, November tends to witness fewer prospective homebuyers, translating to reduced competition and lower home prices. Overall, spring signifies the peak season for home sales, implying a plethora of properties hitting the market, albeit potentially at or above the asking price. Here's an overview of what to expect during each season when contemplating a home purchase: Spring: Elevated housing inventory alongside intensified competition and pricing. Summer: Peak season characterized by a highly competitive market but a broader housing inventory. Fall: Commencement of declining home prices, offering a heightened potential for price negotiations before winter sets in. Winter: Diminished inventory and lower home prices. Examining the housing market in Rhode Island and Massachusetts, home prices in February 2024 witnessed a 5.6% increase compared to the previous year. However, with 4.3% more homes listed for sale and a 3.4% uptick in homes sold compared to the previous year, the market appears to be stabilizing. These statistics suggest that the current climate might be conducive to purchasing a home in Rhode Island and Massachusetts. 2. Navigating a Seller's Market vs. a Buyer's Market In the realm of real estate, the terms "seller's market" and "buyer's market" hold significant relevance, influencing the dynamics of home buying and selling. A seller's market denotes a scenario wherein market conditions and housing demand surpass the available supply. In such instances, sellers hold the advantage due to an abundance of prospective buyers relative to available properties. During a seller's market, homes tend to sell swiftly, often receiving multiple offers. For buyers, navigating a seller's market can be challenging, albeit rewarding for those seeking expeditious transactions. Conversely, a buyer's market represents a paradigm wherein demand falls short of the available housing supply, affording buyers the upper hand. This typically translates to stabilized or reduced home prices, alongside an array of options and room for negotiation. However, properties may linger longer on the market, which could pose challenges for those in urgent need of relocation. At present, mortgage rates remain low in Rhode Island and Massachusetts. However, industry experts anticipate an influx of buyers and sellers entering the market. According to the Rhode Island Housing Finance Agency, the current housing market leans towards a seller's market due to limited inventory. Nonetheless, emerging neighborhoods and burgeoning construction projects may tilt the scales in favor of buyers. 3. Key Considerations When Buying a Home Numerous factors warrant consideration when embarking on the home-buying journey. Depending on individual preferences, objectives, and life circumstances, certain considerations may carry more weight than others. Here are some crucial aspects that prospective homebuyers should contemplate to facilitate a successful home purchase: Location The paramount factor to consider when purchasing a home is its location. Location not only influences property prices but also impacts daily life significantly. Commence your home search by pinpointing one or multiple preferred locations, enabling you to discern favorable deals from suboptimal ones. Home Size When selecting a home, bear in mind that you'll likely inhabit it for years, potentially amidst evolving family dynamics. Ensure that the chosen property accommodates your present and foreseeable future needs in terms of bedrooms, bathrooms, and overall living space. Additionally, assess the property's potential for future expansions or renovations to align with evolving requirements. Price Price represents a non-negotiable factor in the home-buying equation. Prioritize affordability by assessing your financial capacity, including down payment capabilities and monthly expenditure. Moreover, maintain a financial buffer to account for unexpected expenses and contingencies. 4. How Can You Determine if Now's the Right Time to Buy a House? Whether you're a renter contemplating homeownership or an existing homeowner eyeing a new abode, evaluating the opportune moment for a home purchase is paramount. Consider the following guidelines to ascertain your readiness for homeownership: Healthy Credit Score A robust credit score is instrumental in securing favorable mortgage terms. While some home loans may accommodate borrowers with credit scores as low as 500, higher scores afford access to better interest rates and loan conditions. Ensure that your credit score is optimal to capitalize on advantageous mortgage options. Affordable Down Payment and Closing Costs Prior to committing to a home purchase, ascertain that you possess the financial means to cover down payments and closing costs. These expenses typically constitute a percentage of the property's purchase price, necessitating prudent financial planning. Additionally, allocate reserves for deposits, inspections, maintenance, and unforeseen expenditures. Know What You Want A clear understanding of your preferences and requirements streamlines the home-buying process. Compile a list of essential and desirable home attributes to guide your search effectively, enabling informed decisions aligned with your needs and preferences. 5. Practical Tips for Homebuyers Navigating the intricate terrain of home buying necessitates a strategic approach. Employ the following tips to enhance your home-buying journey: Familiarize Yourself with Your Credit Score A thorough comprehension of your credit score facilitates informed decision-making and enhances your negotiating leverage. Embrace Compromise Flexibility is paramount when exploring home purchase options. Prepare to make compromises while remaining attuned to your non-negotiables. Plan Ahead Anticipate potential hurdles and devise contingency plans to circumvent obstacles, ensuring a smoother home-buying experience. Remain Flexible Adaptability is key when navigating the dynamic real estate landscape. Stay open to alternative options and be prepared to adjust your preferences as needed. Leverage the Expertise of a Trusted
7 Most Common HOA Violations in Rhode Island and Massachusetts

7 Most Common HOA Violations in Rhode Island and Massachusetts   Are you considering moving into an HOA neighborhood and want to learn more about the most common HOA violations? Here is everything you need to know about the seven most common HOA violations in Rhode Island and Massachusetts.   A homeowner's association (HOA) is an organization that creates and enforces rules and regulations in a neighborhood, community, subdivision, or residential building known as covenants, conditions, and restrictions (CC&Rs). Homeowners in the community will pay the HOA a monthly or yearly fee for maintenance and upkeep in the neighborhood.   Across the U.S., there are over 370,000 homeowners associations with over 40 million households in total. This represents over 53% of all households in the country. However, there are many pros and cons of HOAs, mainly because homeowners are worried about the repercussions of violating the rules of their HOA.   Before you move into an HOA neighborhood, it is essential to understand the most common violations. This way, you can be better prepared, especially if you are a first-time home buyer. There will be much to think about when moving into your first home; ensure you are completely ready beforehand.   An HOA will have a manager or leader appointed by the board and/or residents who runs inspections and confirms that all residents are abiding by the rules. In some cases, an HOA will hire a management company to oversee these inspections and rectify issues and violations made by residents.   In most cases, residents may not be aware of all the rules and regulations to which they should adhere. In order to avoid violating a rule by accident or not knowing, here are the most common HOA violations.   Keep reading to learn all about the seven most common HOA violations.   Chapters: Landscaping Noise Vehicles and Parking Holiday Decorations Trash Pickup Undisclosed Rentals Exterior Renovations 1. Landscaping The majority of rules enforced by an HOA have to do with the exterior of homes. Many neighborhoods care deeply about curb appeal and will have rules to regulate the way homes look from the street. The HOA will be in charge of how the neighborhood looks, from clean streets to yards. In other words, the HOA will oversee how each home presents itself, and if the landscaping is not in check, it may result in a fine or violation letter. Here are some examples of restrictions that many HOAs have in relation to landscaping: Type of plants or trees in your yard. They have restrictions on how close your trees and plants can be to the street and/or your neighbor's property. Homeowners cannot let their grass become overgrown. Homeowners can only use drip irrigation along their curb and sidewalks. The height of your bushes and shrubs in your front yard. Essentially, your HOA will need your yard to be kept clean and look similar to your neighbors' yards. As long as you continue with yard upkeep, you shouldn't have to worry about HOA violations. 2. Noise As the organization in charge of enforcing the CC&Rs, your fellow residents are permitted to contact the HOA if you are being too noisy. Many HOAs have restrictions on loud noises between certain hours. Depending on the distance between homes in your neighborhood, your personal preferences, and your relationships with your neighbors, this can become a problem. Be extra careful if you host a lot of social gatherings that may exceed the decided times for noise purposes. Keep in mind that your HOA cannot restrict what sounds can or cannot be heard, but they can impose rules between the decided times. In addition, your city or county may have noise ordinances set by which you will need to abide. 3. Vehicles and Parking Rules and regulations on vehicles and parking are extremely common with HOAs. Depending on the amount of land in the neighborhood, many HOAs have restrictions on where you can park. This can mean that you can only park in your driveway or limit the amount of cars parked on the street in front of your house. It is important to consider that if you host a lot of social gatherings, you should definitely encourage your guests to use a ride-share service or carpool. You can even talk with your HOA about parking at a public parking lot in the community, like the country club or pool. In addition, your HOA will most likely have rules about parking boats, commercial vehicles, or RVs in the driveway or the street. Check to see if you need a permit in your community to keep one of these vehicles on the street for an extended amount of time to avoid violating the rules. 4. Holiday Decorations Many homeowners pride themselves on their holiday decorations. However, some HOAs may have restrictions on how many decorations you can have. There shouldn't be any restrictions regarding the type of holiday decorations, but you will need to be careful not to go overboard. Additionally, there may be restrictions on how soon before a holiday you are allowed to put up your decorations and when you will need to take them down. Some HOAs don't have any rules about holiday decorations; you will need to check the guidelines in your community to be sure. Here are some common things to think about in relation to holiday decorations and HOA violations: Noisy decorations that may disturb your neighbors past a certain time. Rules on the light color variations as some HOAs may want a uniform look from all residents during the holiday season. Offensive decorations. Inflatable decorations. Fire safety policies pertaining to holiday decorations. 5. Trash Pickup Homeowners in an HOA can run into trouble if there are restrictions on when they can put trash on the street for pickup. Most neighborhoods have a set time when trash will be picked up. If you miss this time and leave your trash on the street for an extended amount of time, you can be subjected to written notices of violations or fines. In order to avoid this violation, read through your HOAs CC&Rs and watch out for the words "cannot be in public view." This pertains to where you can leave your trashcans on your property. Communities will differ in these rules, but most enforce Not only can trash attract pets, but it can also impact the community's appearance, which is extremely important to HOAs. Similarly, neighborhoods have set days or times when trees, branches, or leaves will be picked up. This is usually once a week, and homeowners often get into trouble when they miss this time and leave it on the street all week. 6. Undisclosed Rentals Many communities in HOAs have rules impacting whether homeowners can sublet their properties or not. This is a result of security and insurance reasons. In most communities, insurance is dependent on the percentage of owners versus renters. Therefore, you will need written permission from your HOA to sublet your home. HOAs will hold all the power when it comes to issuing fines and barring subleasing properties if a tenant does not comply with the rules. Some homeowners rent out rooms or the entire home, such as Airbnb sublets, which can lead to problems related to destruction, parking, and noise. This is because, in some cases, renters don't feel obligated to preserve the integrity of the property and community. Since the tenant is not a member of the association, the board cannot enforce rules on the tenant. As a non-compliant member, the board cannot evict the tenant; the homeowner would be responsible for this. An HOA will not typically ban all rentals in a community; it is usually a cap or lease restriction. Rental caps will limit the total percentage of homes that can be rented at a time, commonly 20%. 7. Exterior Renovations Many homeowners buy homes with the intent to renovate, whether on the interior or exterior. However, most HOAs have rules and hoops to jump through when a homeowner asks to make modifications to the property. This is because the HOA has certain architectural guidelines the homeowner must abide by. This will depend heavily on your neighborhood's specific rules and regulations. An HOA may want the neighborhood to keep a uniform appearance. Or there may be restrictions on additions that are impeding on the neighbor's property, both of which would be outlined in the CC&Rs. There are a couple of common exterior renovations and add-ons that will need HOA approval, including updating your siding, building an addition, replacing the roof, and installing a swimming pool. Ensure that you speak with your HOA before any exterior renovations so as not to violate the rules and regulations. Methodology We used information and data from several different sources, as well as our own data, to determine everything you need to know about the most common HOA violations in Rhode Island and Massachusetts. Most of the data was sourced from the following sources: Rhode Island Department of Justice Massachusetts HOA-USA Homeowners Protection Bureau FAQ: Most Common HOA Violations Here are a couple of commonly asked questions about common HOA violations. How much power do HOAs really have? The amount of power an HOA has differs from state to state. For example, according to Massachusetts Civil Code 4350, HOAs can enforce essentially any rule they want to, as long as it doesn't conflict with a local, state, or federal law. What power does an HOA have in Rhode Island? In Rhode Island specifically, an HOA's board has the power to enforce covenants, adopt budgets, assess and conflict member fees, maintain and regulate common areas, and act on behalf of the association in legal matters granted by the RIPCRA and the community's declaration. Who regulates HOAs in Rhode Island and Massachusetts? Neighborhoods and subdivisions with homeowners' associations established after January 1, 1999, are governed by the Rhode Island Planned Community Act and Massachusetts HOA Act. No state or federal agencies are overseeing HOAs. Can an HOA evict a tenant in Rhode Island and Massachusetts? An HOA does have the power to evict a tenant in the states of Rhode Island and Massachusetts. However, the association needs to go through the homeowner since the tenant's agreement is with the homeowner, and the association's agreement is with the homeowner. Can an HOA take your home in Rhode Island and Massachusetts? An HOA does have the right to get a lien on your property or foreclose on your home if you fail to pay your HOA dues. Most Common HOA Violations - The Bottom Line HOAs are not the enemy, and the rules are fairly created and enforced by residents of the neighborhood. Nevertheless, you will be obligated to follow the rules and may face consequences if you violate them. As long as you stay up to date with the CC&Rs of your HOA and follow them, you will love living in an HOA. If you do make any of these common HOA violations, the procedures may vary. Still, typically, your HOA can issue warning letters, impose fines, revoke access to common areas in the neighborhood, take legal action, or place a lien on the homeowner's property until the debts are paid. If you are debating joining a neighborhood with an HOA, make sure to talk with your real estate agent because they can inform you more about your local HOA rules and regulations. As you are searching for your next home, Rhode Island and Massachusetts have many beautiful homes for sale in HOAs; you'll have to act fast if you want to buy your dream home in one of the best neighborhoods. Before you buy your next home, feel free to contact one of our helpful real estate specialists, as they are eager to help you find the perfect home. We know that buying a home can be overwhelming, so make sure you are prepared beforehand.
Frequently Asked Questions for Home Sellers in Rhode Island and Massachusetts

Frequently Asked Questions for Home Sellers in Rhode Island and Massachusetts   As you prepare to sell your home in Rhode Island and Massachusetts, you may find yourself with numerous questions about the process. Here’s what you need to know to navigate the complexities of selling your property:   Making the decision to sell your home is significant, requiring careful planning and preparation. Whether you're relocating to a new neighborhood or downsizing, working with a skilled real estate agent can help ensure a smooth and profitable sale.   Selling a home can be daunting, but understanding common questions asked by other sellers can help alleviate some stress and guide you towards informed decisions for your family.   Here are the key things home sellers should consider:   Chapters Determining the Best Time to Sell Assessing the Real Estate Market Disclosures to Potential Buyers Determining Home Value Effective Marketing Strategies Repairs and Home Inspections Fair Market Value Increasing Home Value Consider Offering a Home Warranty Seek Professional Guidance 1. Determining the Best Time to Sell Timing is crucial when putting your home on the market. Typically, the spring months, especially May, are ideal for selling. Warmer weather and longer days attract more buyers, particularly families looking to settle before the new school year. While fall and winter may offer cheaper moving costs, they often yield lower seller premiums. November, in particular, marks the beginning of the holiday season, making it a less favorable time to sell. 2. Assessing the Real Estate Market Before listing your home, it's essential to evaluate the current state of the real estate market. As of February 2024, both Rhode Island and Massachusetts are experiencing a seller's market, characterized by high demand and limited inventory. Cities like Providence and Boston are witnessing strong buyer interest, making it an opportune time to sell. 3. Disclosures to Potential Buyers Sellers must disclose certain information to potential buyers by law. This includes any material defects or hazards that could affect the property's value or pose safety risks. From structural issues to environmental hazards, full disclosure ensures transparency and protects both parties involved in the transaction. 4. Determining Home Value Understanding your home's market value is crucial for setting the right asking price. Collaborating with a real estate agent and scheduling a home appraisal can provide valuable insights into your property's worth, enabling you to price it competitively and attract potential buyers. 5. Effective Marketing Strategies A successful sale hinges on effective marketing strategies employed by your real estate agent. From online listings to social media promotion and hosting open houses, a comprehensive marketing plan is essential for reaching prospective buyers and maximizing exposure for your property. 6. Repairs and Home Inspections Addressing necessary repairs before listing your home can enhance its appeal and potentially increase its value. While sellers in Rhode Island and Massachusetts are not obligated to conduct a home inspection, opting for a pre-inspection can identify any issues in advance and facilitate smoother negotiations with potential buyers. 7. Fair Market Value Fair Market Value (FMV) is the price at which a property would sell in an open market. Understanding FMV is crucial for setting an appropriate listing price and ensuring a fair and successful transaction. 8. Increasing Home Value Various home improvement projects can enhance your property's value without breaking the bank. From enhancing curb appeal to updating interiors and improving energy efficiency, investing in strategic upgrades can make your home more appealing to potential buyers. 9. Consider Offering a Home Warranty Providing a home warranty can offer added peace of mind to buyers and protect against unforeseen issues post-sale. While it entails additional costs, a home warranty can be a valuable selling point and instill confidence in potential buyers. 10. Seek Professional Guidance Selling a home involves numerous complexities, so seeking guidance from experienced professionals is essential. Whether you're working with a real estate agent, home inspector, or appraiser, leveraging their expertise can streamline the selling process and ensure a successful outcome. In conclusion, selling your home in Rhode Island or Massachusetts requires careful consideration and informed decision-making. By addressing common questions and seeking guidance from real estate professionals, you can navigate the selling process with confidence and achieve your desired outcome. If you're considering selling your home in the area, reach out to one of our knowledgeable agents for expert assistance and support.
10 Alarming Signs Your Roof May Need Repair

  Signs Your Roof May Need Repair   Is your roof showing signs of wear and tear? Here are ten indications that your roof may be in need of repair.   Your roof serves as a shield against various elements such as sunlight, snow, rain, wind, and debris, making it a crucial component of your home's structure. The constant exposure to weather conditions can take a toll on your roof over time, necessitating repairs or even replacement. To better understand the functioning of roofs, let's break them down into layers.   In Rhode Island and Massachusetts, your roof typically begins with a sturdy deck made of plywood or oriented strand board. In warmer areas, such as parts of Massachusetts, foil-faced panels may be used to reflect heat, aiding in insulation and reducing energy costs by maintaining a cooler attic temperature.   To protect the underlying plywood, an underlayment, often made of felt and sometimes reinforced with fiberglass, is installed. This underlayment serves as an additional barrier against water infiltration, complementing the protection provided by shingles.   Following the installation of the roof structure and underlayment, aluminum or steel drip edges are affixed along the roof's perimeter to enhance its resistance to wind and water.   Once these foundational layers are in place, it's time for the shingles. Asphalt shingles are the preferred choice for many homes in the Rhode Island and Massachusetts areas due to their durability and affordability. These shingles, typically made from felt or fiberglass, form a protective barrier against water and sunlight, serving as the primary defense against the elements.   Different climates call for different roofing materials. In Rhode Island and Massachusetts, where weather conditions vary, it's essential to choose roofing materials that can withstand the local climate effectively.     Types of Roofs   Roofing materials vary depending on factors such as climate, architectural style, and budget. Here are some common roofing materials used in Rhode Island and Massachusetts:   Asphalt Shingles   Widely popular and cost-effective, asphalt shingles are available in various shapes and sizes, making them suitable for different roof styles. However, they may not fare well in areas with extreme temperature fluctuations.     Fiberglass Shingles   These shingles, reinforced with fiberglass, offer enhanced durability and water resistance compared to traditional asphalt shingles.   Wood Shingles   While environmentally friendly and durable, wood shingles are more prone to fire damage and require regular maintenance to prevent issues like termites and mold.   Metal Roofing   Increasingly popular, especially for flat roofs, metal roofing offers longevity and durability, with materials such as low-galvanized metal, copper, tin, zinc, and aluminum being commonly used.     Slate Shingles   Known for their longevity and superior water resistance, slate shingles are a premium roofing option but come with a higher price tag and require specialized installation and maintenance.   Signs Your Roof Needs Repair   1. Roof Age   Pay attention to the age of your roof, as older roofs are more prone to damage and may require repairs or replacement.   2. Shingles Buckling or Curling   Buckling or curling shingles indicate potential water damage and may necessitate immediate attention from a roofing professional.   3. Loose Ballast   Loose ballast can lead to water infiltration and structural issues if not addressed promptly.   4. Leaking   A leaking roof is a clear sign of damage and should be addressed immediately to prevent further interior damage.     5. Valleys in the Roof   Valleys in the roof can trap water, leading to deterioration of the underlying structure.   6. Missing Shingles   Missing shingles compromise the roof's integrity and should be replaced promptly.   7. Chimney Flashings   Damaged or loose chimney flashings can allow water to enter the home, leading to leaks and water damage.     8. Shingle Pieces in the Gutters   Finding shingle fragments in the gutters indicates roof deterioration and may warrant inspection by a roofing professional.   9. Bounce   Bouncy spots on the roof may indicate underlying water damage and should be investigated further.   10. High Energy Bills   A damaged roof can result in energy inefficiencies, leading to higher utility bills.   Final Thoughts   Your roof is a vital component of your home's structure, protecting it from the elements and maintaining energy efficiency. Regular maintenance and timely repairs are essential to prolonging your roof's lifespan and ensuring your home remains safe and comfortable. If you notice any signs of roof damage, don't hesitate to consult a professional roofing contractor to assess the situation and recommend appropriate repairs or replacements. Your home's safety and longevity depend on it.
Brendan Duckworth

Brendan Duckworth

Phone:+1(401) 787-7128

Leave a Message

What would you like to know?